Why this post?
This post is 100% search engine bait designed to help others avoid the pitfalls I encountered while integrating our hosted ElasticSearch cluster with our Okta SSO environment. The specific issues encountered were that the Elastic Cloud post discussing Okta integration provides slightly incorrect guidance on the setting of a particular elasticsearch.yml parameter. The other “lesson learned” was that some of the very helpful step-by-step posts on the internet are now slightly out of date in that it appears that Elastic Cloud has changed the UI and process for Kibana role mapping.
I also have to acknowledge both Izek Chen and Mehdi Kianpour as the authors of the “step by step” integration guides that saved me a ton of time when setting this up for my own organization.
Who is this post for?
This is for people like myself who have Okta administrator access but are new to ElasticSearch, Kibana and the hosted Elastic Cloud service and wish to provide Okta based SSO login integration to hosted Elastic Cloud clusters in 2021.
Read These Links First
I don’t want to write another “step-by-step” guide as the ones that exist already are very helpful. My goal with this post was just to document the deltas and changes I encountered when following in their path in May of 2021. Read the links below and then perhaps the extra info in this post may be helpful to you.
Elastic Cloud SAML Landing Page:
www.elastic.co/blog/how-to-enable-saml-authentication-in-kibana-and-elasticsearch
Very Helpful Step-By-Step Guides:
faun.pub/sso-elastic-cloud-with-okta-integration-step-by-step-b4b3b63126b6
nettweets.com/2019/08/22/integrating-kibana-in-elastic-cloud-with-okta-step-by-step/
2021 Lessons Learned from Okta Integration with Elastic Cloud
- The Elastic Cloud SAML page suggests incorrect values for “attributes.principal”

This is well covered in the step-by-step posts made by others but is worth highlighting. The Elastic Cloud SAML page suggests that the value of attribute.principal be set to “nameid:persistent”. This appears to be incorrect when performing integration with Okta. Your elasticsearch.yaml file should instead just set the value of attributes.principal to just “nameid”.This is what it looks like on our deployment:

- You can provide the idp.metadata.path as a URL pointing at your Okta application, it does not have to be an actual file.
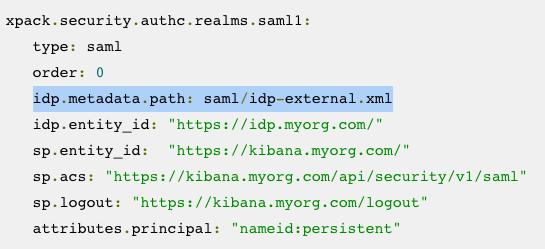
Image: note that the Elastic Cloud documents show idp.metadata.path as a physical file. This does not have to be the case when integrating with Okta.This was actually covered in one of the step-by-step guides that I found very helpful but I ended up initially going down the path shown in the Elastic Cloud documentation which treats the IDP certificate and metadata as assets that must exist as physical files on your Elastic Cloud environment. The process for making a zip file and uploading it as a bundle is well documented and straightforward but this is 100% not necessary when using Okta as your IDP — instead you can set the idp.metadata.path value as an HTTPS URL pointing straight at your Okta application metadata endpoint.This is what our actual elasticsearch.yml configuration looks like, being able to insert a URL for the IDP metadata information is much faster than bundling and uploading a zip file to your cluster deployment.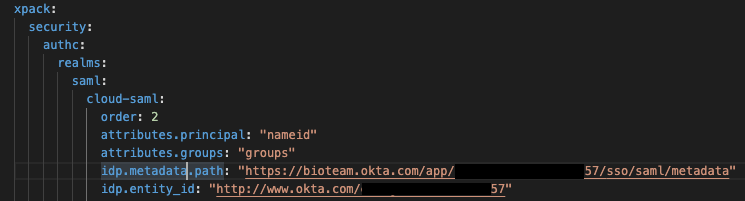
Image: Note the use of an HTTPS URL to provide dynamic IDP metadata information.As the other step-by-step guide shows, the URL for the metadata information can be easily found within the Okta Application configuration page. Go to Application -> Sign On. The URL will be the one linked as “Identity Provider metadata”: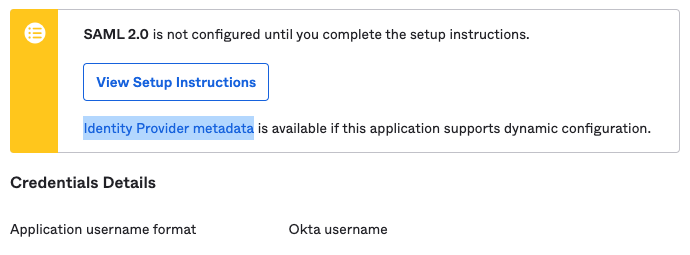
- Follow Izek Chen’s Role Mapping example using Okta Group attributes
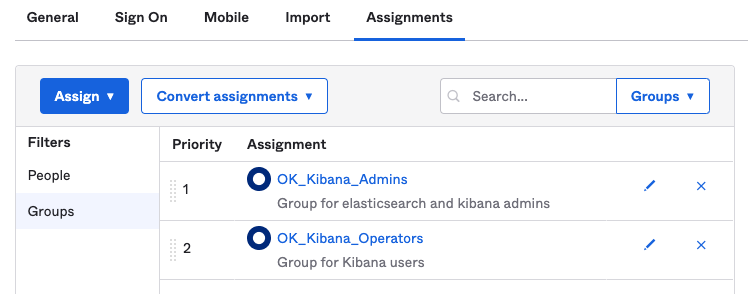
Image: The groups we currently have in our Okta Application config for Elastic CloudIn the step-by-step guide posted at faun.pub/sso-elastic-cloud-with-okta-integration-step-by-step-b4b3b63126b6 Izek Chen configures Okta Group attributes based on the prefix “OK_Kibana“. This is useful for enabling Role Based Access control to Kibana based on Okta group membership.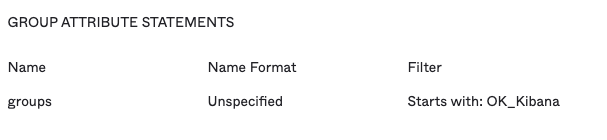
- Kibana Role Mapping appears to have changed in later releases of the Elastic Cloud stack

First off, the documentation for Kibana Role Mapping seems to assume you know where and how to make those configuration changes. As a complete novice with Kibana, it took me a while to figure out that access to this interface was under “Stack Management -> Role Mappings”. The first major issue I encountered was that the step-by-step guides show that Role Mapping was configured 100% using a JSON document structure. That does not seem to match how Role Mapping looks in our installation of 7.12.1 where it appears that the Role Mapping interface has broken “Role Mapping & Roles” and “Mapping Rules” into separate configuration blocks.And it looks like JSON formatted configurations are only accepted for Mapping Rules and not for Role Mapping itself. This is what my Role Mapping interface looks like and I had to configure it “by hand” rather than use the JSON examples provided in the step-by-step guides:
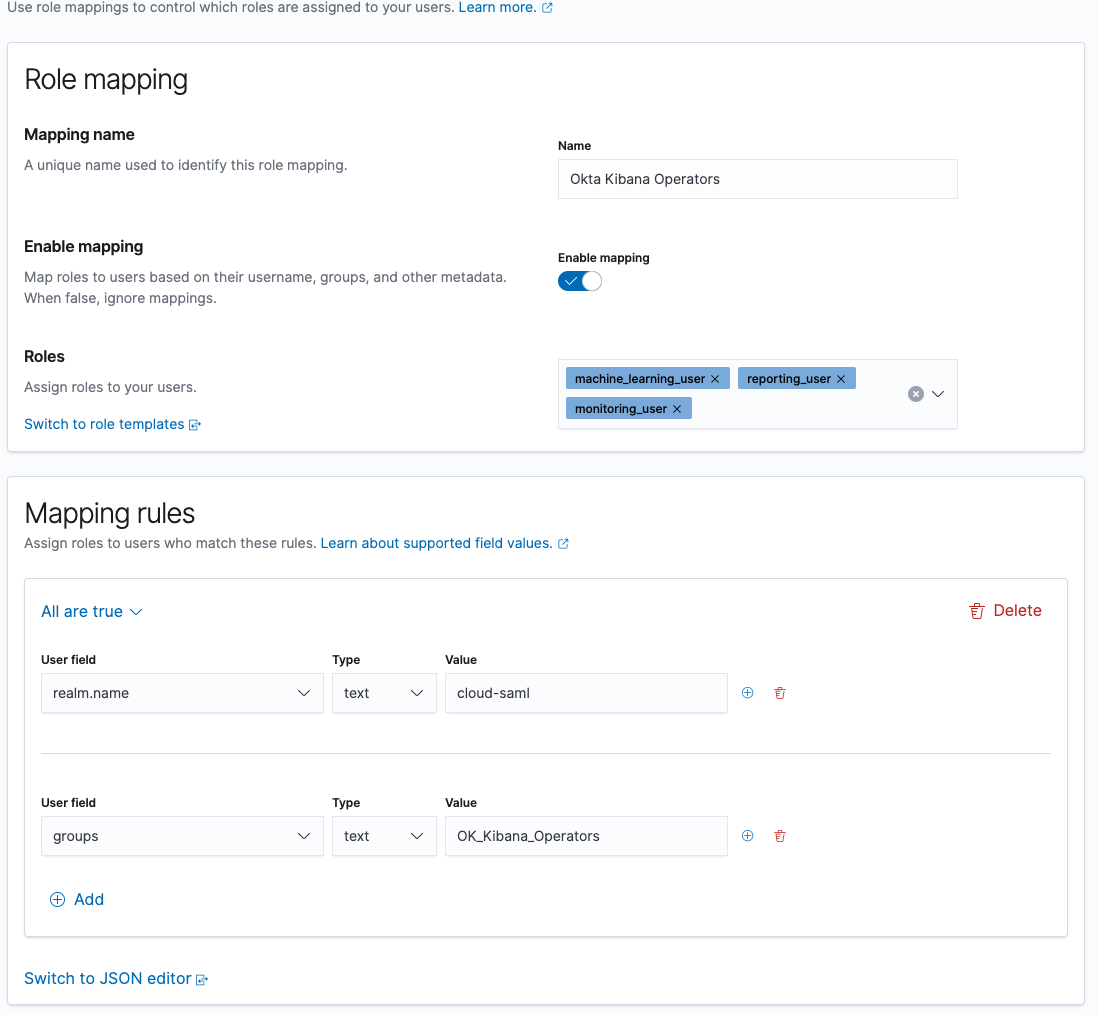 I ended up reading the JSON examples provided by others and manually configuring Role Mapping for each of our Okta Groups. However you can upload JSON into version 7.12.1 for just the Mapping Rules portion:
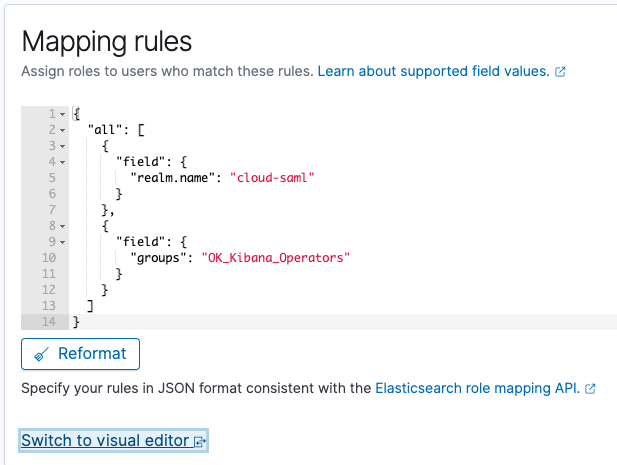
So if you are following along with the step-by-step guides be prepared to see your Kibana Role Mapping interface look a little bit different than what the other guides are showing. I was not able to do all of the Role Mapping using a single JSON document. - Last Advice — you probably have more than one elasticsearch.yml file to update! This is also covered very explicitly in the step-by-step guides, but I missed that advice and lost a bunch of time on Elastic Cloud deployment failures. In our environment we have a “Hot data and Content tier” backed by a “Cold data tier” and each instance has a dedicated elasticsearch.yml file that must be edited and consistent.If you have more than one Tier in your Elastic Cloud environment then you have more than one elasticsearch.yaml file to edit! Don’t make my mistake and waste a bunch of time troubleshooting a cluster edit deployment failure! Edit both files at once and make sure things are consistent.Hope this is helpful at least to someone out there on the Internet!